Monday, November 25, 2013

Babymoon to Cabo San Lucas

According to the Oxford Dictionary:

babymoon

Syllabification: (ba·by·moon)
Pronunciation: /ˈbābēˌmo͞on/
Noun
  • a relaxing or romantic vacation taken by parents-to-be before their baby is born:on the eve of my third trimester, we boarded a plane for a week-long babymoon among the quiet canals of Amsterdam
Now, I don't know if I'd recommend Amsterdam as a babymoon destination, like the example above, but I would DEFINITELY recommend Cabo San Lucas, where Scott and I spent a blissful week.
We stayed at the Hilton Los Cabos Beach & Golf Resort and it was wonderful. The pool area, service and food were all excellent. I went to the spa, Scott golfed, we ate lots of chips and drank margaritas (virgin for me!). Cabo San Lucas is a fun town and I can't wait to go back when I'm not pregnant. Here are some of the highlights from our vacation:

El Squid Roe Bar

Amazing tableside guac AND salsa

The famous Cabo Wabo Cantina

Scott hit the links at Cabo Del Sol's beautiful Ocean Course

Cabo Del Sol

Cabo Del Sol

24 week picture fell on golf day :-)

Cabo Del Sol

Cabo Del Sol

Hanging at the hotel bar

Hotel lobby pic before heading into town

Beautiful beach at the Hilton

Sunset Da Mona Lisa restaurant on our last night

Sunset selfie

View of El Arco and Lands End

It was a little cloudy but still made for a beautiful view


Can't wait to go back!


Thursday, October 17, 2013

Facelift!

If you visted today, you may notice that I'd been changing up the fonts/backgrounds/etc. and pretty much just playing with the whole layout. I was using a great template from LeeLou Blogs but the template was going to expire. So, I had to search and search for something I liked better. Finally found some options I liked on Shabby Blogs so a huge shout out and thanks to them! I might still be playing with the title to see if I can jazz it up a bit, but for now, here's the new look.

Wednesday, October 16, 2013

Start Spreading the News

We are officially halfway through my pregnancy! There's lots of excitement that comes with the 20 week mark. We're busy working on the baby's room, tackling the daunting task of choosing a stroller and I have spent some serious time in the Destination Maternity fitting room.

One of the most exciting moments in this pregnancy (so far!) has been telling our families that we were expecting. I captured the moments on video and have been playing around with some editing programs. I made this video using Microsoft Movie Maker.

To tell my parents, we gave each of them an impromptu present. Each grandparent opened up a book; Just Grandma and Me and Just Grandpa and Me from the Little Critter collection, a favorite when I was a kid. To tell Scott's parents, we surprised them with a decorative sign for Nancy's "family photo wall" that said "The best parents get promoted to grandparents." Each family had a different but wonderful reaction.


Tuesday, October 1, 2013

The Project That Involved 1,000 Squats

Since we moved in, we knew our fence needed some love. We put it off for two summers as we worked on other projects. We also knew that there's no way we'd tackle it next summer with a new baby so we decided to do it this fall.

Our fence is a cedar fence and it had gotten so gray and very moldy/mildewy, especially on the north facing sides. Here's a shot of it before; this picture makes it look not that bad, but it was.


We started the project by power washing it clean. Side note: power washing is amazing. Here's an action shot of a section that had been power washed (on the right) and an old, not power washed section (on the left.)


Amazing difference. When the fence was wet, it looked like it had a reddish color to it, however, once it dried, it was very light, almost like plywood. We needed to stain the fence to give it some color and protect the wood from future mold and water.

We chose Sherwin-William's Woodscapes Semi-transparent Stain in Chestnut, which is a medium brown color. We chose a semi-transparent stain because we figured it would be more forgiving as the fence aged vs. a full coverage stain. We severely underestimated the amount of stain we'd need for the project. We bought 2 gallons. Then we went back and bought 6 more. We chalk some of this up to using a paint sprayer aka the best thing ever. 

More on the sprayer. The sprayer is where the squats came in. We purchased this Homeright Finish Max Sprayer from Amazon. It was worth every single dollar we spent on it, and I already have some plans to use it on other projects. The beauty of the sprayer was that we could apply the stain with it and then I just back brushed it over the fence slats to work it in. It made the project go a million times faster, though we did have to stop to fill up the paint cup often. As for the squats...Scott got a major workout. When you use a sprayer, you have to keep it level and move it up and down, so he had to squat down to get the bottom of the fence on every other slat. Two coats worth. He was sore! I followed with the brush which involved some moderate squatting and bending!

We applied two coats of the stain (first coat Saturday afternoon, second coat Sunday morning). The second coat really brought the color out and we're thrilled with the results!


Overall, this project was easy but time consuming. Scott and I spent about 8-10 hours power washing the fence (he did the majority of it) and then the next weekend, we spent a total of probably 6-8 hours applying the two coats of stain.

Even though this is a project we hope we will never need to tackle again, at least we know we can! We've been enjoying the updated fence with the beautiful fall weather and already changing leaves in our yard. We were so tired after the project, but we felt a huge sense of accomplishment. It was definitely a rewarding DIY project!

Monday, August 26, 2013

National Dog Day

This is apparently a thing! I'm into it. Love our little guy! 


Monday, July 29, 2013

Easy Art

This past weekend I created some $5 artwork for our master bathroom "water closet". Is that word not hilarious? It's a pretty accurate description for the little room where our toilet is housed off the main master bath. Inspired by something I pinned a while ago, I used a cheap two pack of canvases, leftover craft paint and painters tape to create some art.

First step is tape the canvas in all sorts of directions. Next paint. Let dry. Remove paint. Admire! It was so easy and Scott tells me he enjoys having something to look at in there now! ;-)

My helper
Two pack of canvases from Michael's ($5)
No rhyme or reason to this. Just tape. Wrap tape around the sides.
Paint - any color, any pattern. Paint the sides of the canvas as well.
Supplies.
Ta-da!

Tuesday, June 25, 2013

Our New Patio Unveiled

Our patio has been done for about a month now but we've just finished up the landscaping in the backyard. We've been absolutely loving the outdoor living space and have been entertaining and dining outside whenever possible. I gave a preview of what the construction looked like in this post, but I didn't share any true "before" pics.

A view from the "upper yard" looking at the sad, sad lawn.

Another view from above, capturing the space where the new patio will live. (Ignore the spray paint project going on!)

Panoramic shot from the old stoop.

Another shot from the old stoop.
I'm going to let the after pics speak for themselves. We love it!

Looking out at the patio from the new stoop.
View from the corner, where our grill sits now, with the lovely green "upper lawn" and landscaping that will grow to cover the green fencing.
Panorama from the stoop.
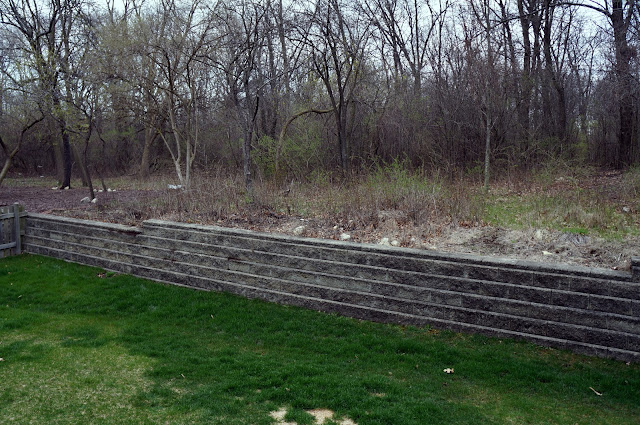
The game changer! New steps in the retaining wall that connect the upper and lower yards.
A big table for entertaining was a must-have for us.
Comfy seating and fireplace (we usually put the fireplace where the table is when we use it.)
New, wide stairs!
Lawn with a few trees we kept, plus new landscaping.
Wider shot of the trees. The back two are calling out for a hammock I think.
  We chose stained and stamped concrete plus Unilock for the wall work. We're super happy with everything so far and can't wait to enjoy this patio for years to come!

One final panorama before and after, because I'm a sucker for a good transformation shot!


Wednesday, June 12, 2013

Green thumb? We'll see...

"Aren't those going to die in like two weeks?" - Scott

The hope is that, no, the flowers I've planted around our house will not die in two weeks. But it's a fear! In all fairness, Scott was actually just confirming that the flowers planted outside are not like a dozen cut roses that will look pretty but then hit the trash 10 days later. I assured him that the annuals I planted SHOULD bloom all summer long.

I asked a million questions of my mom who accompanied me to purchase some perennials for our front walk way. With her guidance, hopefully these babies last! I'd love nothing more than to plant these once and have them come back each year. I chose a combo of pink and purple flowers that should widen up as summer goes on. I'm happy with them so far...they haven't grown that much yet but they are looking good. (Please excuse the sidewalk crack!)


I purchased this planter bench a few months ago and it sat, unpainted, on our porch for a bit. Last weekend, I got around to color matching some exterior paint to our trim, slapping it on and then planting these little beauties. They should grow 12-18 inches high and widen up.


Finally, to finish up the front yard, I sprayed an old planter with Oil Rubbed Bronze paint and sealed it. This freebie came from my grandma's house and it is about 100 pounds of pure concrete. It was kind of beat up with some chips and stains on the formerly white color. I made sure to use a spray paint that is suitable for masonry (Rustoleum Universal). With it's new, trendy look, it will house some annual flowers in the summer and fall - I'm thinking mums come fall. It's perfect for the tiny space between the walkway and the house...the plant that was planted here previously died and I think it's because of the small growing area.


Growing up, my mom planted petunias every year on our deck. I tried my hand at one small pot of petunias last year but unfortunately Rocco (who was a very curious puppy at the time) ended up causing some serious harm to it. This year I purchased three gorgeous planters at Homegoods and am giving petunias another shot. The planters remind me of Crate & Barrel and I love that the white will let the trailing flowers really pop. I planted Wave Petunias because, according to mom, they are hard to kill - they love heat and hold up well.


This fall I hope to plant some tulip bulbs so we have early spring flowers that take little to no work! What are you planting this summer?